How to… Use PDF patterns
PDF sewing patterns are cheap, convenient, and easy to use, but if you’ve never used one before, they can be a bit daunting.
In this post we look at how PDF patterns work with step by step instructions to help you print and use your pattern.
The most exciting thing about PDF patterns is that you can buy them, print them, and start sewing right away! All you need is any standard printer and some plain white paper. there is also the option to send your PDF off to a copy shop to get it printed in large format.
What do you get in a PDF sewing pattern?
At My Handmade Wardrobe Patterns, we provide all our patterns as downloadable PDFs. When you purchase a PDF pattern you usually get 2 pattern files:
1. A0 pattern sheets which you can send to a copy shop printer to print off
2. A print-at-home version which you can print onto A4 or US Letter paper and assemble.
There are no file print limits on our downloadable patterns. You can print the patterns off as many times as you like.
All we ask is that you don’t share our patterns with fellow sewists. We work hard to create awesome patterns for you, and we want to continue. So, by encouraging your friends to buy their own copy of the pattern, you will help support us to create more in the future.
Here’s a quick video to help you print and use PDF dressmaking patterns:
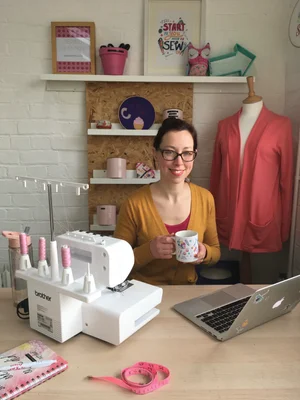
Kim shares why she is now a PDF convert and how easy it is to purchase, download and use PDF patterns.
Our PDF print-at-home patterns can be printed onto standard A4 or US Letter paper. All our downloads include a PDF sticking guide so you can easily see which bits should join to which.
How do I print a PDF pattern at home?
1. Get ready to construct your pattern
You will need:
· A glue stick or some sticky tape, preferably in a tape dispenser. This can double up as a pattern weight!
· Paper scissors or a guillotine.
· Pattern weights or a couple of tins of beans can be useful to hold everything down while you tape.
2. Download your files
Download your zip file and save it somewhere safe on your computer. Printing PDFs is usually easiest from a computer rather than a phone or tablet but it can be done from any device.
Most computers come with built-in software to extract your PDF files from a zip folder. Generally, you can simply double click on the folder to open it. If yours doesn’t do this, you can download unzipping software online.
3. Print the PDF sticking guide
It’s a good idea to print this off to reference so you have it handy when you’re surrounded by pieces of pattern. In our newest patterns we have included this on page 1 of the pattern sheets so just print this first.
4. Print Page 1 ONLY of the tiled PDF pattern first
This is possibly the most important step. If you don’t check your pattern printout is the correct size, this will throw out all the measurements.
Print onto A4 paper making sure the “fit to page” option is NOT selected and that the printing is set to 100% scale.
Print page 1 only first. Use a ruler or tape measure to check the sizing box to ensure the pattern is printed to scale.
If it is correct, then go ahead and print the rest of the pattern.
5. Print all your pattern pages
Once you’ve checked your printer settings are correct, then you can print out all your pattern pages and get ready to stick them together using the sticking guide reference.
6. Layout the pattern pieces in the right order
First make some (a lot!) of space and layout your pattern pages according to the sticking guide.
You can either fold in or cut off the right-hand edge of all the pages which join to another page. You can tell which ones these are by looking for this symbol:

7. Stick the pattern pieces together in rows
Align the print box lines and diamond markings on each page. Using small pieces of tape or a glue stick, join the pattern pieces together.
You should now have rows of pages stuck together.

8. Connect the rows together
Next, connect the rows, taking care to keep everything aligned. Some minor discrepancies in signing all markings when sticking may occur, don’t worry too much, it all evens out!
Starting at the joins, cut off or fold up the lower edge of all rows of joined pages except for the bottom row.

Then place the cut/folded edge over the following row. Remember to match the page border lines and symbols as close as possible, but don’t sweat if they’re not 100% perfect!
Hot tip: start at the centre and work out to avoid too much slippage.

Once you’re happy that everything is lined up, get sticking!
All this piecing together can leave some messy bits of paper flapping about. If you want a nicetidy printed sewing pattern, you may want to add a bit of extra tape here and there to hold any loose bits in place.
9. Cut out or trace your size and get sewing
Congratulations! You have constructed your PDF pattern!
Now you have the complete pattern, you can cut out and use them as they are or trace off your size.
Hot tip: If you are using a thin or stretchy material, it is a good idea to trace off your size onto thinner paper which can be easier to pin to wriggly fabrics and will prevent them from distorting.
No time for sticking and glueing? There is anther option…
If that’s all a bit too fiddly and time consuming for you there is a simple solution: you can download and send files to print at a copy shop!
You can send your A0 files to be printed in large format.
Some PDF printing suppliers we recommend are:

Cosy Jersey Add-on Pack
We often share updates and add-on packs as PDFs to help you get even more use out of your My Handmade Wardrobe patterns! Like this Shawl collar and internal pocket pack for the Cosy Jersey pattern.