Sewing Instructions
Follow these tips to make your Simple Top toile ready to check the fit

Once you have cut the pattern to your size and made any necessary alterations, make a toile of the block using a stable fabric – calico is recommended as it is stable, presses well and highlights any fitting issues.
What is a toile and why should I make one?
A toile is a mock-up of the pattern in a plain fabric and is used to check the fit of the garment, check that style lines, darts and details are in the correct place on your body. Toiles can also be used to practice any tricky techniques.
Take time to make a full toile in stages. Begin by toiling bodice and then fit this before adding the sleeves. You may need to make several toiles to get to the perfect fit for you but trust the process…
Creating a well fitted toile of your block leads to creating patterns that fit! You can use your final block toile to map out style-lines, dart placements and details and it will become an essential tool in your pattern making process!
For this next step of the process you will need the following:
Supplies:
Approx. 1.5m of calico for the simple top toile
Contrast colour thread
Equipment:
Tape measure
Masking tape or similar for pattern alterations
Pattern master or clear ruler
Dot and cross pattern paper or tracing paper
Carbon transfer paper (useful, not essential)
Paper and fabric scissors, coloured pens, pencil, rubber
Sewing machine
Use carbon paper to quickly and accurately transfer your markings to the underside of the folded fabric
How to toile your block:
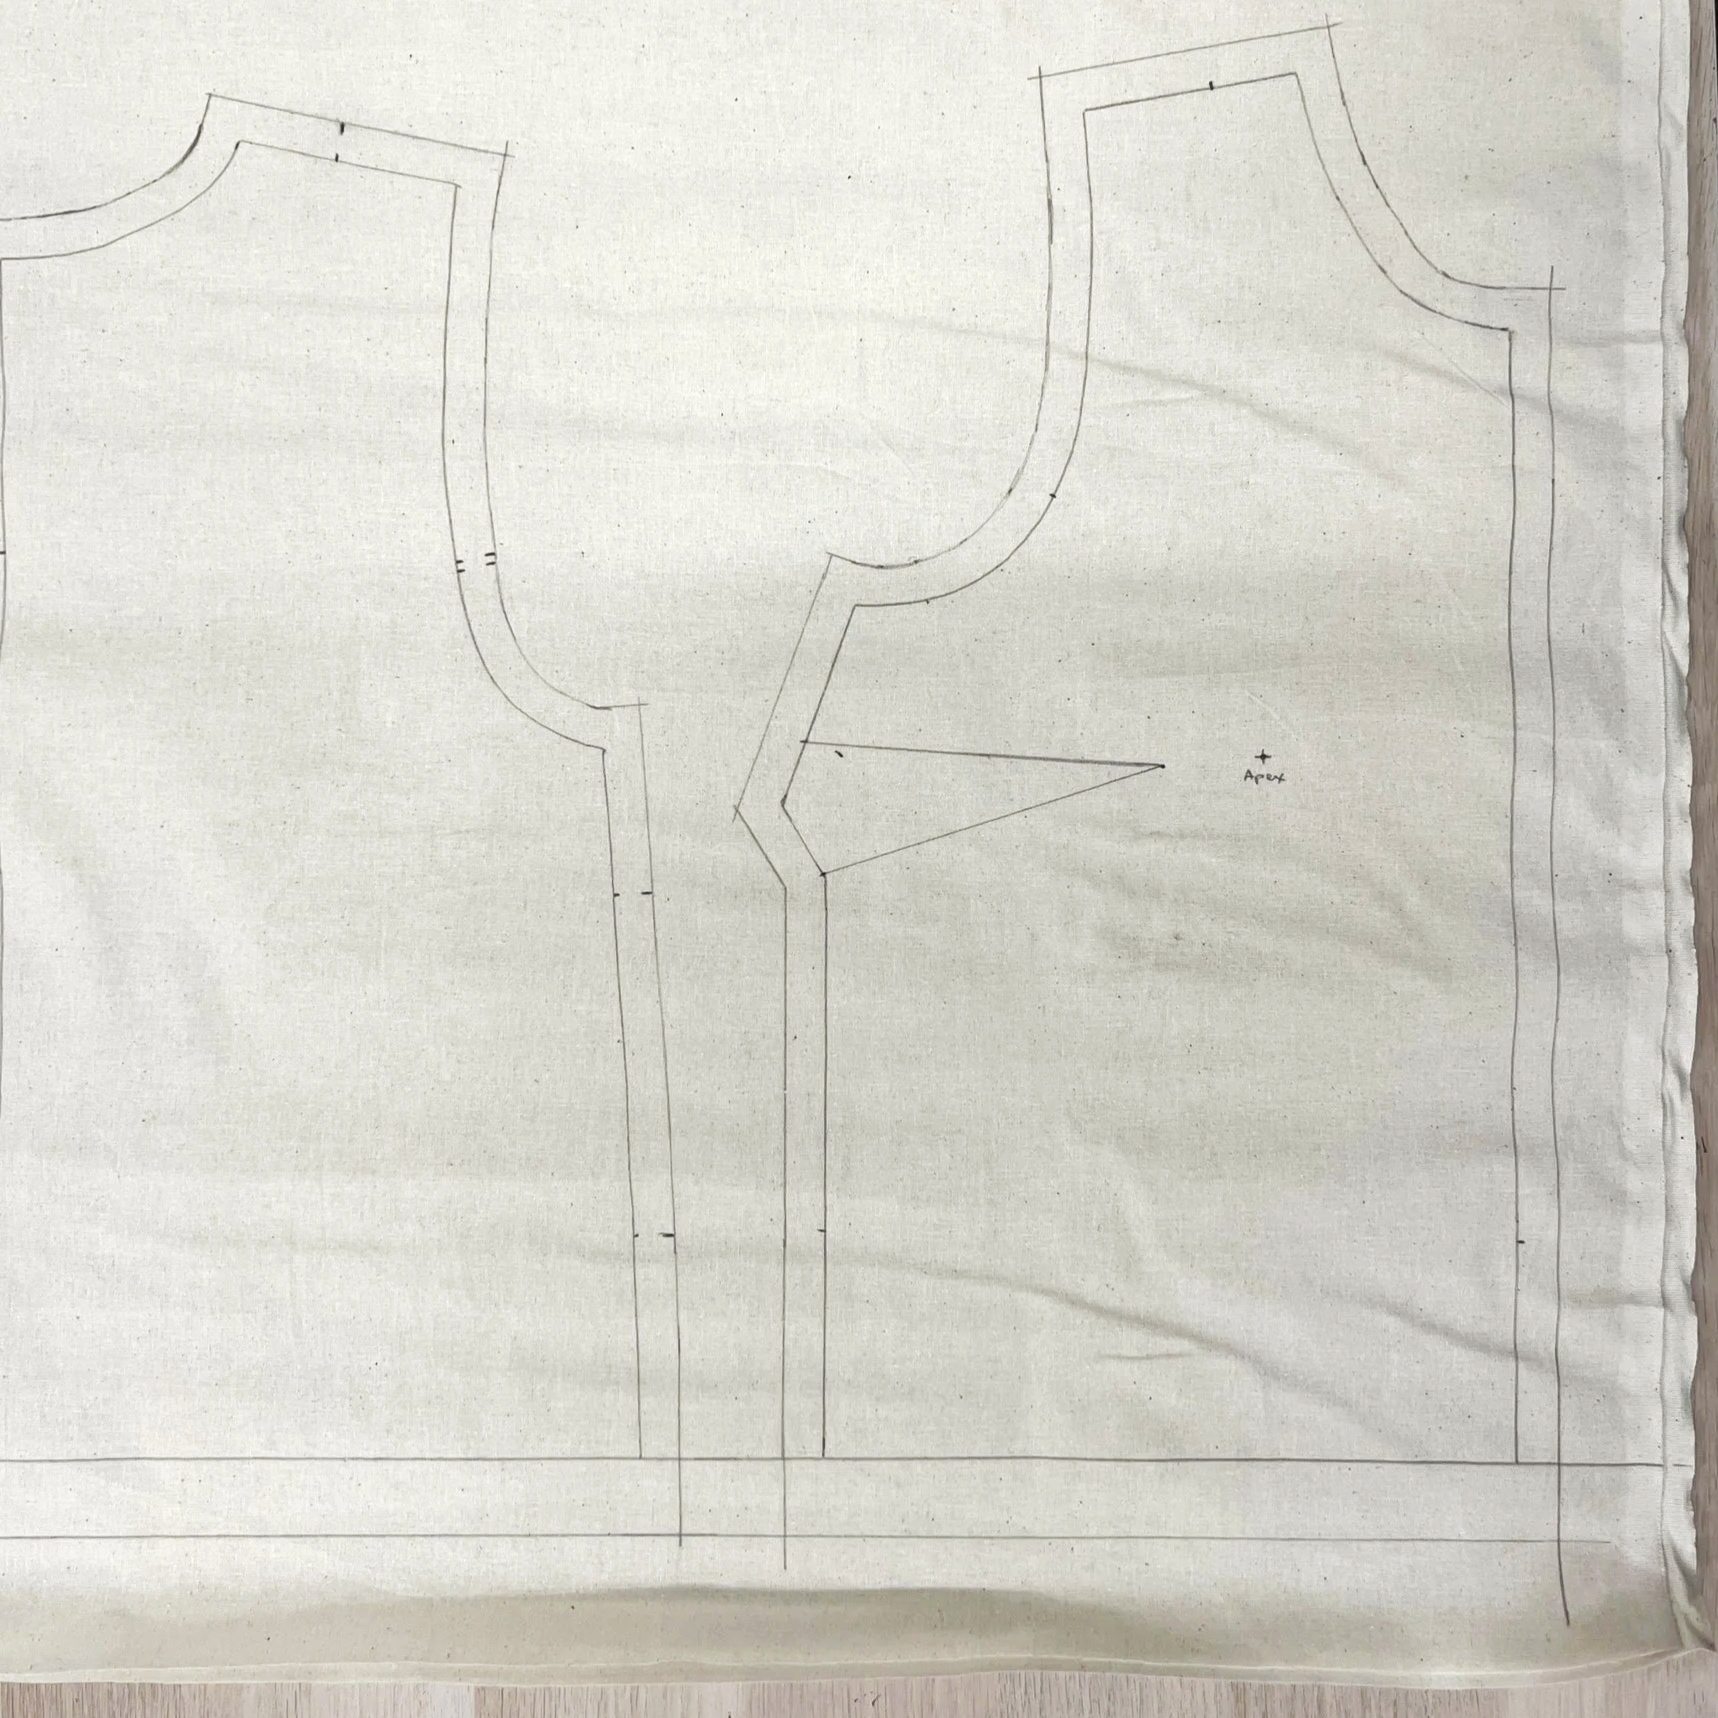
When pattern drafting we usually work WITHOUT seam allowances to make adjusting the pattern and adding details easier.
The simple top pattern DOES NOT include any seam allowances so you will need to draw these on.
Place the pattern on a double layer of fabric. Place the front on the fold and place the back on the straight grain of the fabric.
Trace around the pattern, using carbon paper underneath to transfer the markings to the underside of the fabric. This marks the sewing line and the finished edge of your garment.
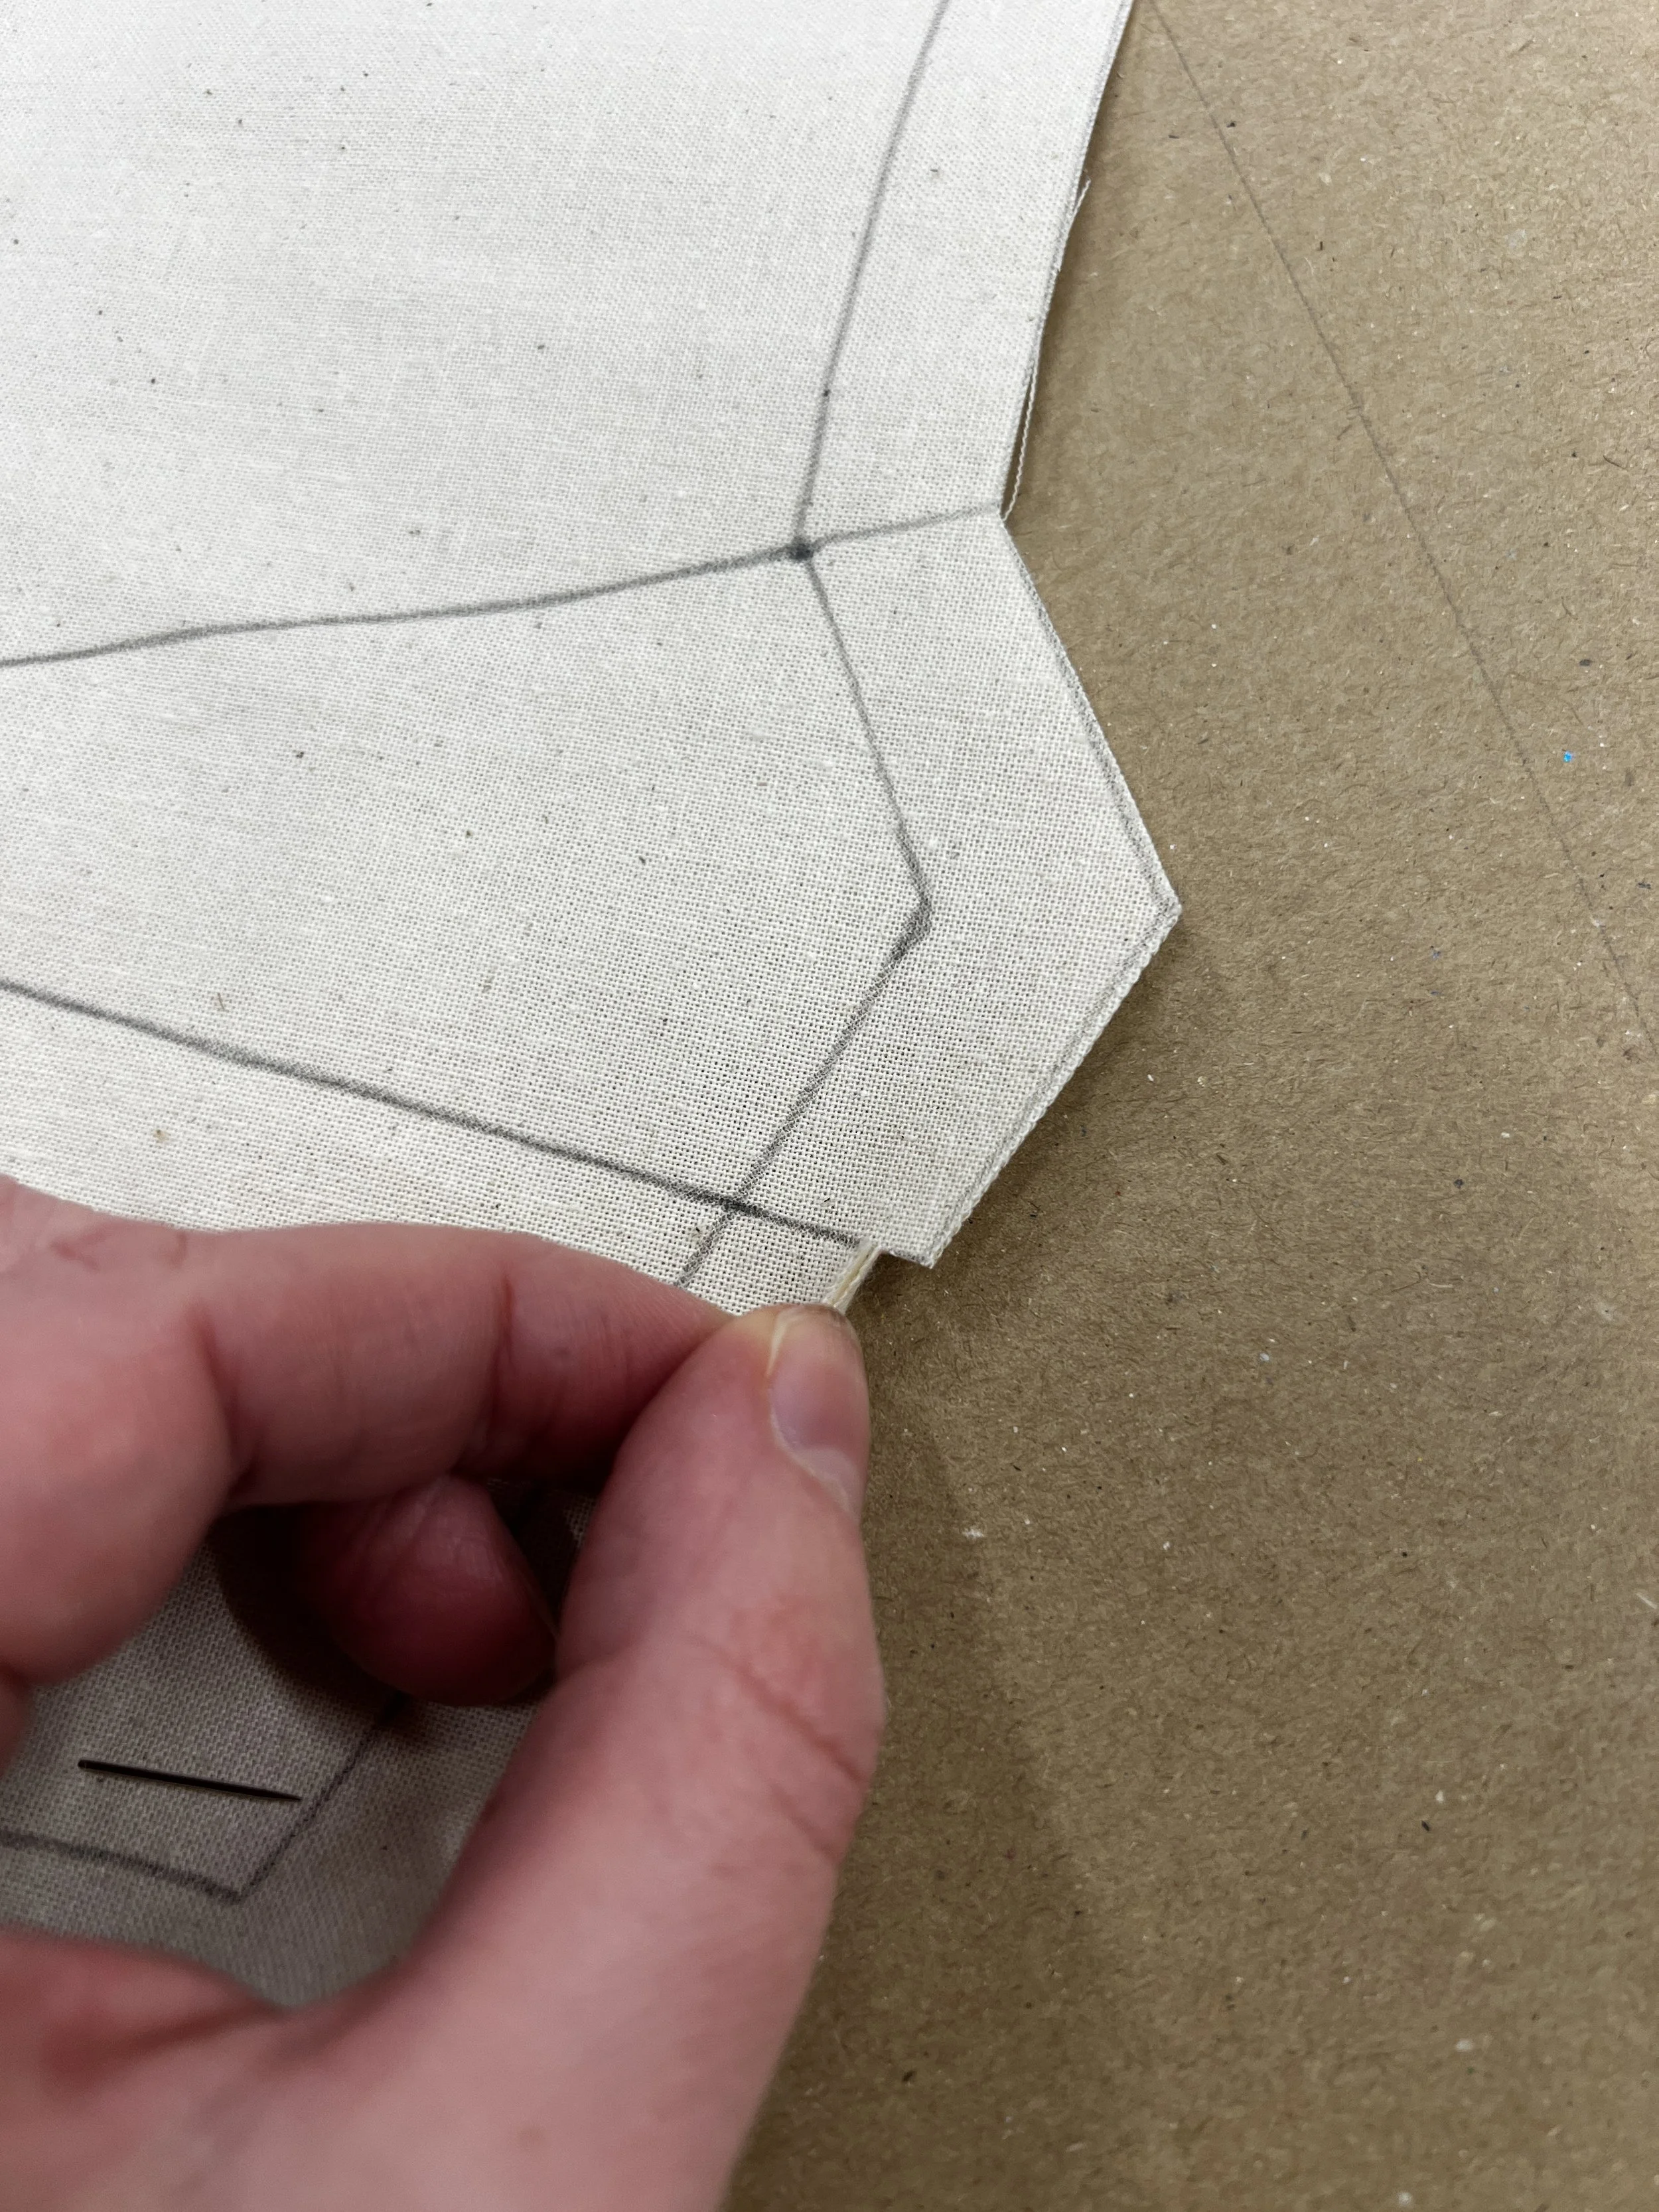
Add 1.5cm seam allowances to ALL edges – armhole, neckline, centre front and back and side seams. If you know you often have fitting issues at the shoulders, add an extra 1.5cm seam allowance to the shoulder seams.
Add 3cm hem allowance.
Mark ALL notches onto the calico – you can use a pencil or carbon paper to mark these on or snip into the edge of the fabric.
Cut around the seam allowance lines. This is called the cut line.
Sew the toile with a long stitch and no back-stitching (as you may need to unpick it to adjust the fit). Join the 2 fronts together at the centre front seam. Join the 2 backs at the centre back seam leaving the top section above the keyhole notch un-sewn.
Join the front to the back at the shoulder seams and side seams, leaving the section of the side seam below the split notch un-sewn.
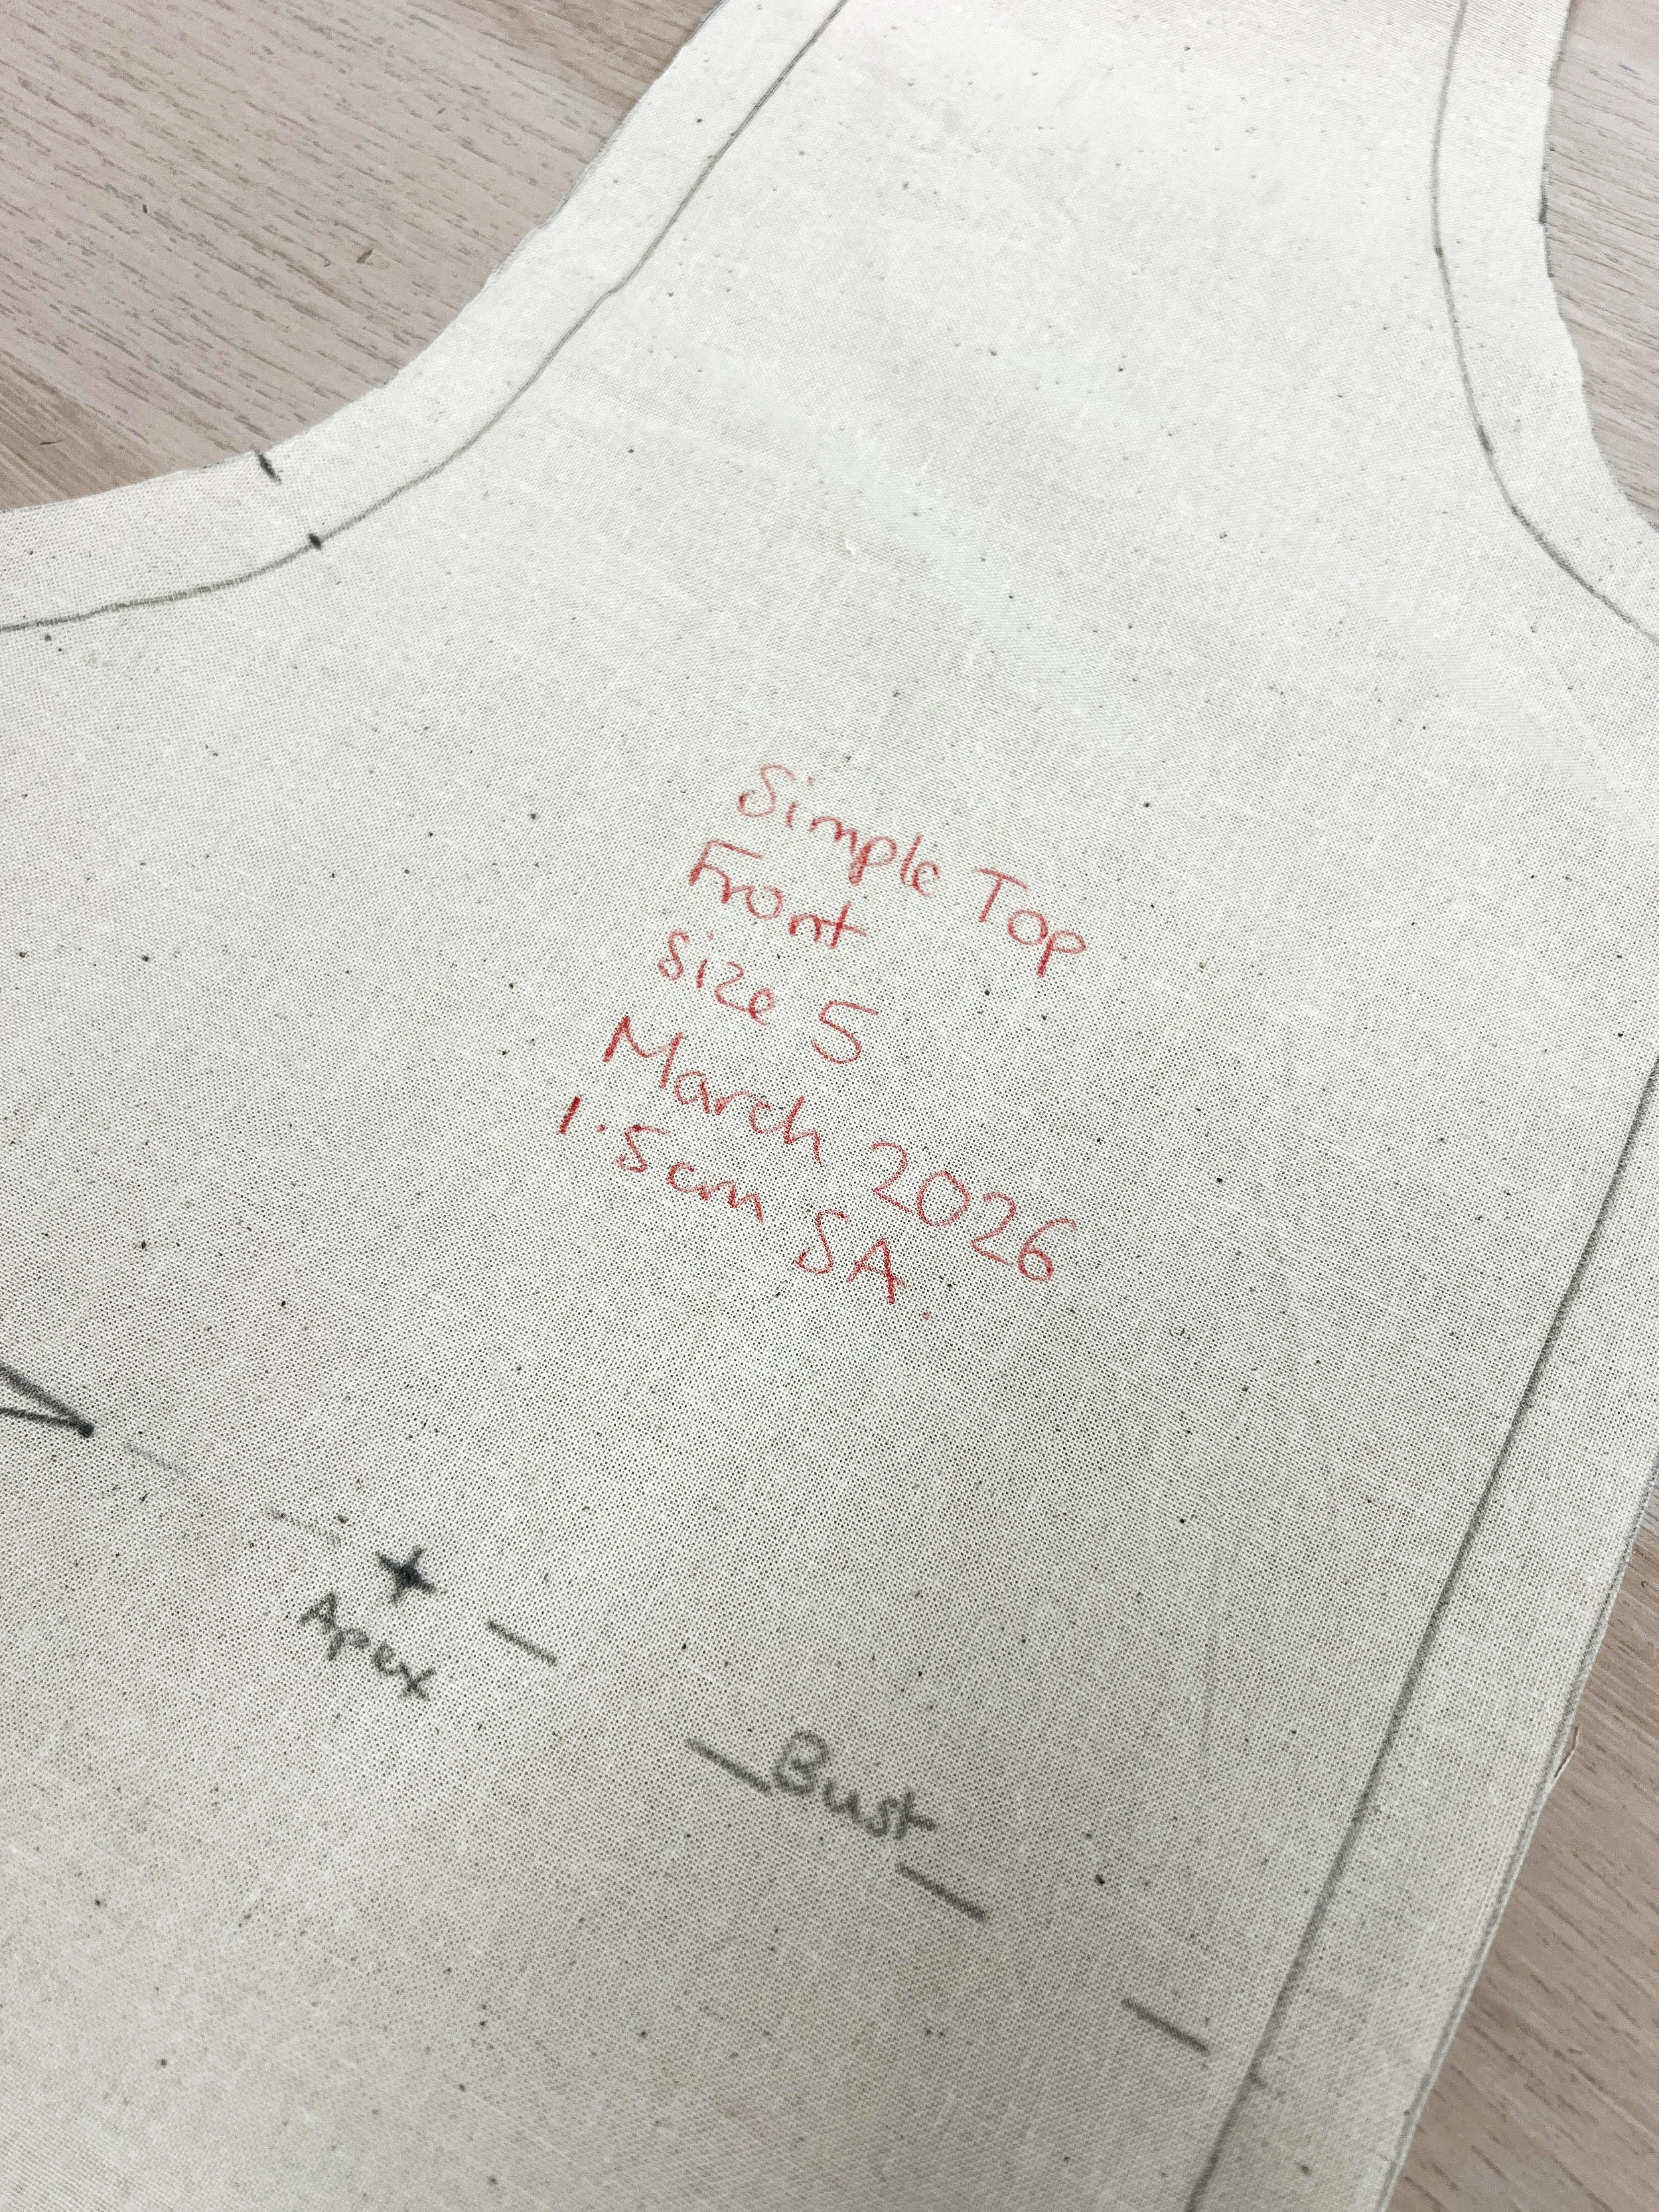
It’s always a good idea to annotate your toiles with the pattern name, size made, date and seam allowance used for future reference.